Replacing garage door springs is a task many homeowners may face, but it’s important to approach this job with caution. Garage door spring replacement can be dangerous if not done properly. This guide will walk you through the process, providing tips to ensure your safety and the effective operation of your garage door.
Understanding Garage Door Springs
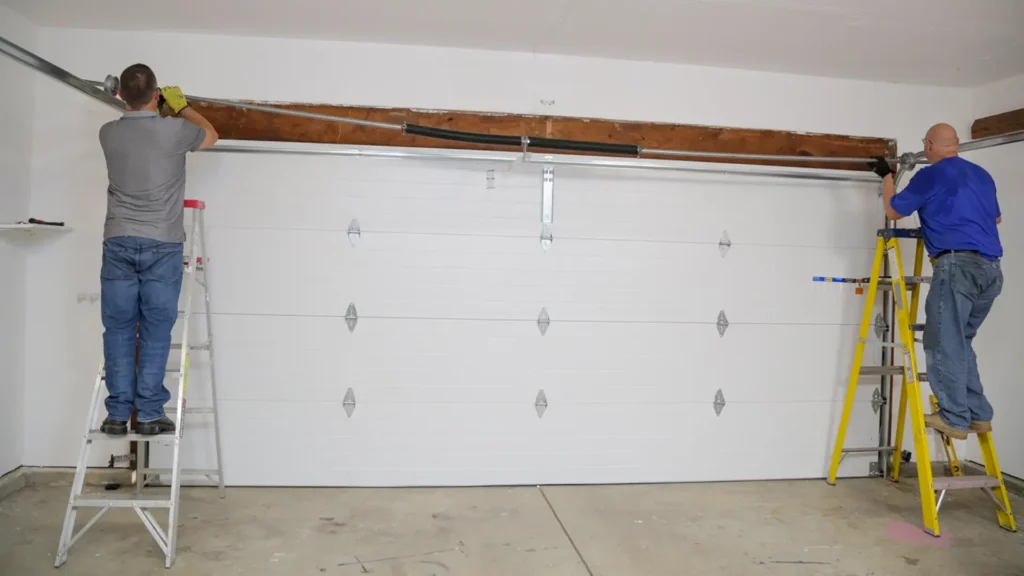
Garage doors typically use two types of springs: torsion springs and extension springs. Torsion springs are mounted horizontally above the door, while extension springs run along the sides. These springs counterbalance the weight of the door, making it easier to open and close. Over time, they wear out and need replacing.
Signs Your Springs Need Replacement
Before diving into the replacement process, it’s crucial to recognize the signs that your garage door springs are failing. Look out for:
- Difficulty Opening or Closing the Door: If your door struggles to move, the springs might be worn out.
- Visible Gaps or Damage: Check for gaps in torsion springs or stretched-out extension springs.
- Loud Noises: Unusual noises, such as creaking or snapping, indicate issues with the springs.
- Uneven Door Movement: If one side of the door is higher than the other, it may be due to a broken spring.
Safety Precautions
Garage door spring replacement is risky due to the high tension in the springs. Follow these safety tips:
- Disconnect the Garage Door Opener: Ensure the door is in the down position and unplug the opener to prevent accidental operation.
- Wear Protective Gear: Safety glasses and gloves are essential to protect yourself from potential injuries.
- Use the Right Tools: Have a sturdy ladder, winding bars (for torsion springs), and other necessary tools on hand.
Step-by-Step Replacement Guide
1. Release Tension
For torsion springs, use winding bars to carefully release the tension. Insert the winding bars into the winding cone and slowly unwind the spring. For extension springs, fully open the garage door to release tension and clamp it in place.
2. Remove Old Springs
Detach the springs from their brackets. For torsion springs, loosen the set screws on the winding cone and slide the springs off the torsion bar. For extension springs, disconnect the safety cables and remove the springs from the track brackets.
3. Install New Springs
Position the new springs in place. For torsion springs, slide them onto the torsion bar and secure them with the winding cone. For extension springs, attach them to the track brackets and reattach the safety cables.
4. Wind the Torsion Springs
Use winding bars to wind the torsion springs. Follow the manufacturer’s instructions for the correct number of turns. Ensure both springs are wound evenly for balanced door operation.
5. Test the Door
Once the new springs are in place, remove any clamps and reconnect the garage door opener. Test the door to ensure it opens and closes smoothly. Make any necessary adjustments to balance the door properly.
When to Call a Professional
While DIY garage door spring replacement can save money, it’s not always the safest option. If you’re unsure about any step or lack the proper tools, it’s best to hire a professional. They have the expertise to handle the high tension of the springs safely and ensure the job is done correctly.
Garage door spring replacement is a crucial maintenance task that can extend the life of your garage door and ensure its smooth operation. By following this comprehensive guide and taking appropriate safety measures, you can replace your garage door springs safely. However, never hesitate to seek professional help if you feel uncertain about any part of the process.
Learn more:
Step-by-Step Instructions for Replacing Your Residential Garage Door Springs